Baked with love; Little Piggies
March 30, 2016I think I may have found one of the yummiest biscuit batters in a long time!!!
I mean *hem* who eats the batter? (yum), not me... *licks fingers*
I was surprised considering that it was one of those recipes that had a list of ingredients that didn't all make sense. Who puts sour cream in a sweet biscuit?
Me now, evidently!
At the start of this month when I said that I would bake gifts for my friends throughout the year (especially near birthdays) I had forgotten that heaps of them have their birthdays in March. Talk about cherry picking my friends.
*sorry you can't join us your birthday isn't in March*
Oh well.
I have been busy baking and sharing with friends. Some of which didn't get shared here and some which were shared under different titles...
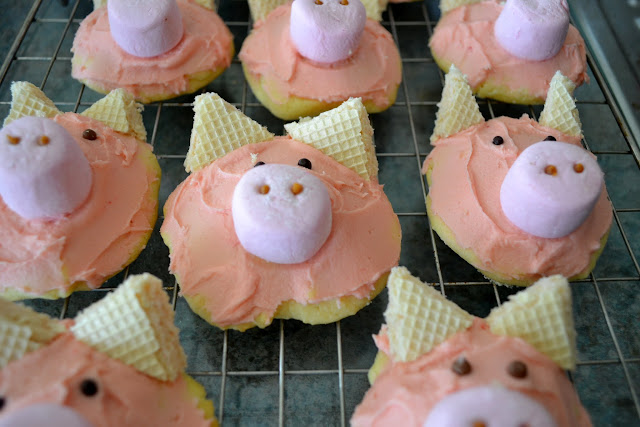
But here is one of the little adorable little gift bake that I made earlier this month. One of the cutest I think and remarkable easy to achieve!
To make these gorgeous little piggies you'll need;
1 cup butter
1 1/2 cup caster sugar
2 eggs
1 cup sour cream
1 tsp vanilla extract
3 cups plain flour
1 tsp baking powder
1/2 tsp salt
To begin, preheat oven to 190˚C and line a large baking tray with baking paper.
In a large bowl, cream butter and sugar until light and fluffy.
Add in eggs, sour cream and vanilla and mix to combine.
Add dry ingredients (caster sugar, plain flour, baking powder and salt) into the mixture and mix again until all combined.
The mixture will be quite thick so you're going to dollop about a tablespoon of mixture onto a lined baking tray. The mixture will spread a little but try to drop into roundish shapes.
Bake for 10-12 minutes, until the edges are golden.
Transfer to a rack to cool before decorating.
To decorate, you'll need;
1/2 cup butter
4 cups icing sugar
2 tsp vanilla extract
6 tbl milk
3-4 drops of red food colouring
Strawberry wafer biscuits
Pink marshmallows
Chocolate crispies
Make pale pink icing by melting butter and adding icing sugar, vanilla and milk. Once combined add the tiniest drop of red food colouring and mix. Slowly keep adding icing sugar until the right colour is achieved. It doesn't take a lot of colouring at all.
Before you begin icing, cut wafers in small triangles.
Ice biscuits, placing two of the cut wafers for ears, marshmallow for nose and chocolate crispies for eyes. I also used a little caramel icing pressed into the marshmallow for the nose holes.
It's surprising how easy something so cute was to make.
Super cute, super easy. If I knew some younger children I would make these all the time!
Maybe you do. Maybe you can instead.
Happy Baking!
xx


0 comments