
Cake pop snowmen and a too hot kitchen
December 24, 2015
So Christmas is just waiting around the corner, and like every
year, I have waited till the very last minute to come up with a cute handmade
gift I can make for everyone. I was proud of myself this year. I started
earlier than usual (usually I begin on Christmas eve or better still Christmas
morning!)

I decided this year to make cake pops decorated as little snowmen.
My personal baking rating: probably never
again...
I thought that I'd done enough reading up on cake pops. I thought that because I'd made some similar cakes before (minus the sticks) that this project would be easy, and yes, many aspects of making these pops are actually really easy and you shouldn't be frightened, but I should have been more cautious and maybe more organised.
If anything, I hope that this will help
you make some cute, last minute Christmas treats or give you enough information that you can make some way better cake pops.

Chocolate cake, prepared (it can be a
homemade one or I used a simple packet mix).
225 g white chocolate melts
Cake pop sticks
About 1 cup Chocolate frosting which can also be store bought but easily made at home.
For the icing sugar:
1 cup icing sugar
2 tbs cocoa powder
40 g butter
1 tbs milk
To decorate I used:

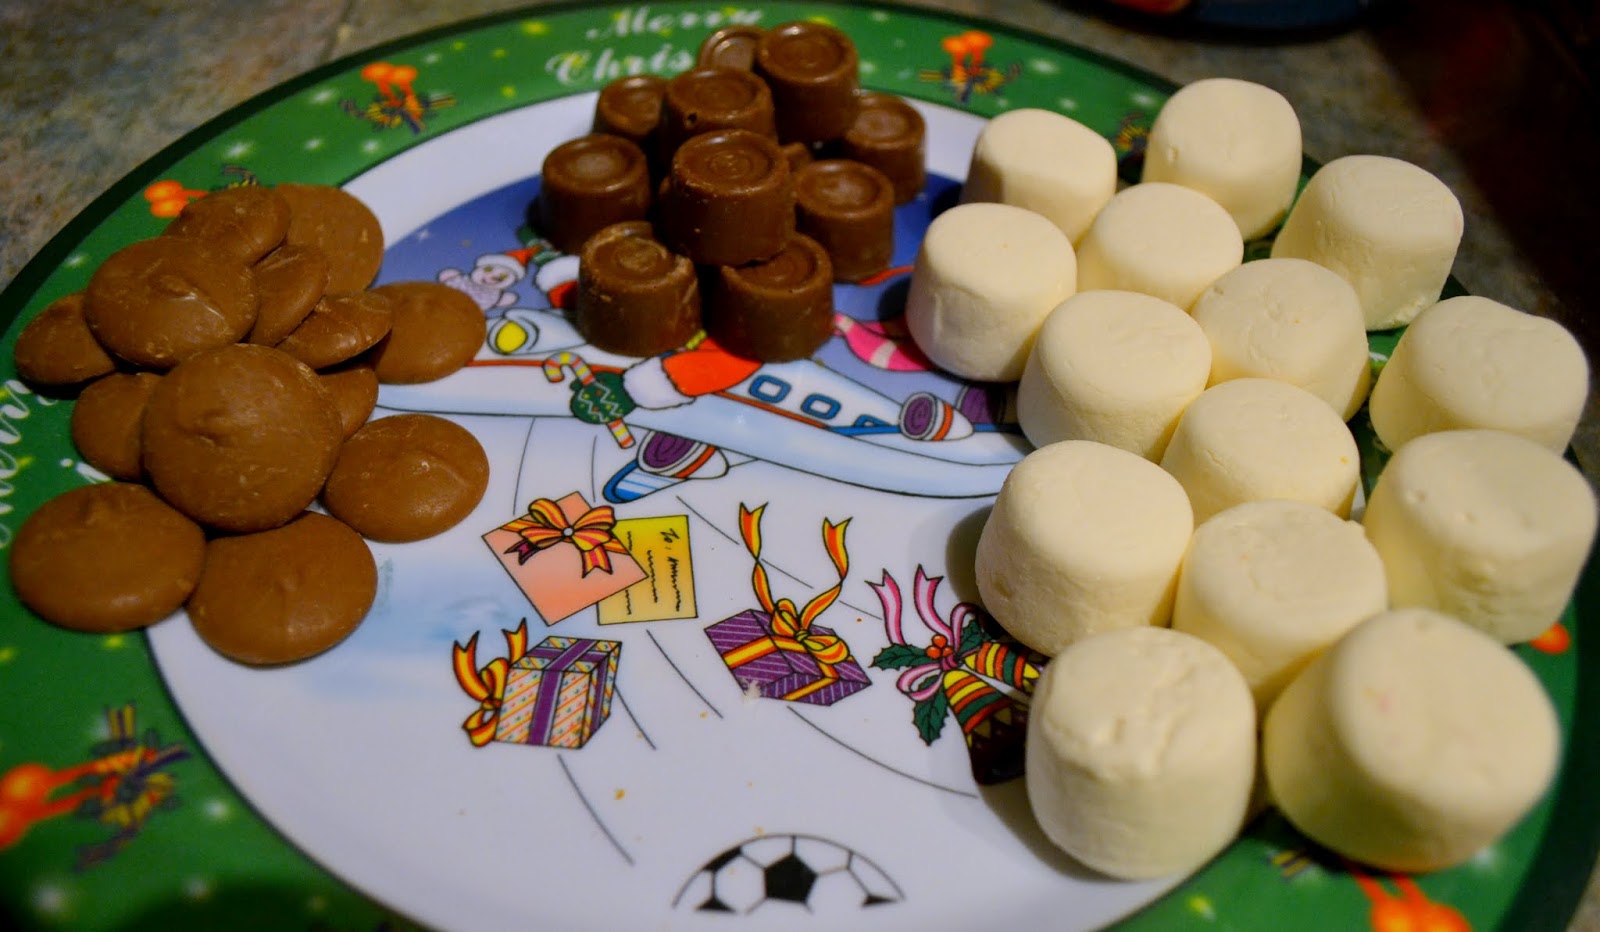
White marshmallows for the heads
Chocolate buttons and Rolo for the top hats
Writing Icing. I used Dr Oetker Chocolate
& Caramel for the eyes, nose and scarf.
To begin, if you haven't already you need to bake the chocolate cake as per the recipe and leave to until completely cool. I baked the cake I used the night before so that
I could be certain that it wasn't still hot inside.
Crumbing the cake can be done by hand like
I did (with Netflix playing) or using a food processor. Basically you just want
fine crumbs in a large mixing bowl.
Make the frosting in a small bowl by
adding the icing sugar and cocoa gradually to the butter and mixing with an
electric beater. Add milk if icing is too dry.
Once made, gradually add the frosting to the crumbed
cake. Mix the cake together with your hands until the mixture is mostly stuck
together. You may not actually need all the frosting which is why it is best to mix with your hands.
Scoop two teaspoons for mixture and roll
into tight balls. Repeat until all cake mixture has been rolled into balls. Place on
plate and chill whilst you melt the white chocolate either in the microwave or over a pot of water on the stove.
Once your chocolate is melted dip one end
of the cake pop sticks into the chocolate and then insert it halfway into the
cake.
Freeze for about 20 minutes.
The next step is where things started getting more
challenging. Firstly, because it was hot, the chocolate that was holding the cakes
on the sticks melted quite quickly. This meant that halfway through coating (because I was slow) I had to refreeze the uncoated ones in a effort to keep them all on their sticks.
I also had trouble coating the cakes. A
deep and narrow glass or bowl makes coating easier as there is less swirling
involved which works really well. However I struggled removing the excess chocolate, I should have tapped on the edge of the bowl and gently turned the cake to get a nice finish. I repeat, TAP off the excess chocolate. It make life much easier.
Also the quicker I worked (so when the
cakes were coldest) the chocolate set better and formed a better coating.
 |
| As you can see I still need some practice... |
I left the chocolate to set on the cakes
for another night because I had problems with all my chocolate not setting well
at room temperature (which could have something to do with over melting).
Once coated place back in fridge to let
the chocolate set. If you plan to decorate with sprinkles or glitter then add
this to the chocolate before placing it in the fridge.
Finally, I got to decorating!

Just a side note: If I'd started earlier
in the day (so not 7pm after work) I could have completed this process in one
day.
Use the remainder of the white chocolate
as glue to stick all the aspects to the cake pop, beginning with the marshmallow
(which because of the heat in the kitchen I fridged again). Stick the Rolo to
the chocolate button and then stick it to the marshmallow.
Add facial features, a scarf and any other
fun additions, package in a cellophane bag with a nice ribbon and you’re done!


Happy baking (and better luck than I had!)
Merry Christmas!
xx
Caitlin


0 comments